Monday, May 28, 2012

DIY Nail Repair


We’ve all been there, getting our nails back into shape, get them filed down and before we can get them painted, we break a nail. Grr! How frustrating is that?!

If you’re lucky, the nail is just splintered and didn’t break clean off. If it just splintered, keep reading to learn how I repair my nail. If it’s a clean break, I just file it down completely. L
Items needed:
  • Tissue paper (white preferably, all I have is a white with bronze stars- if using any color other than white, note that it may stain your nails)
  • Nail Glue
  • Scissors
  • Nail ridge remover
  • Nail File

Steps:
First, cut the tissue paper roughly to cover the entire nail bed minus a little on each side to allow for wiggle room.

Apply nail glue to the entire nail (like you’re painting the nail)

Immediately apply the tissue paper.
 

Using the edge of your nail file, try to smooth as much as possible out. Don’t be heavy handed on this step as the glue leeches through the paper and can easily get everywhere. Let dry completely. Trim off the excess tissue paper. 

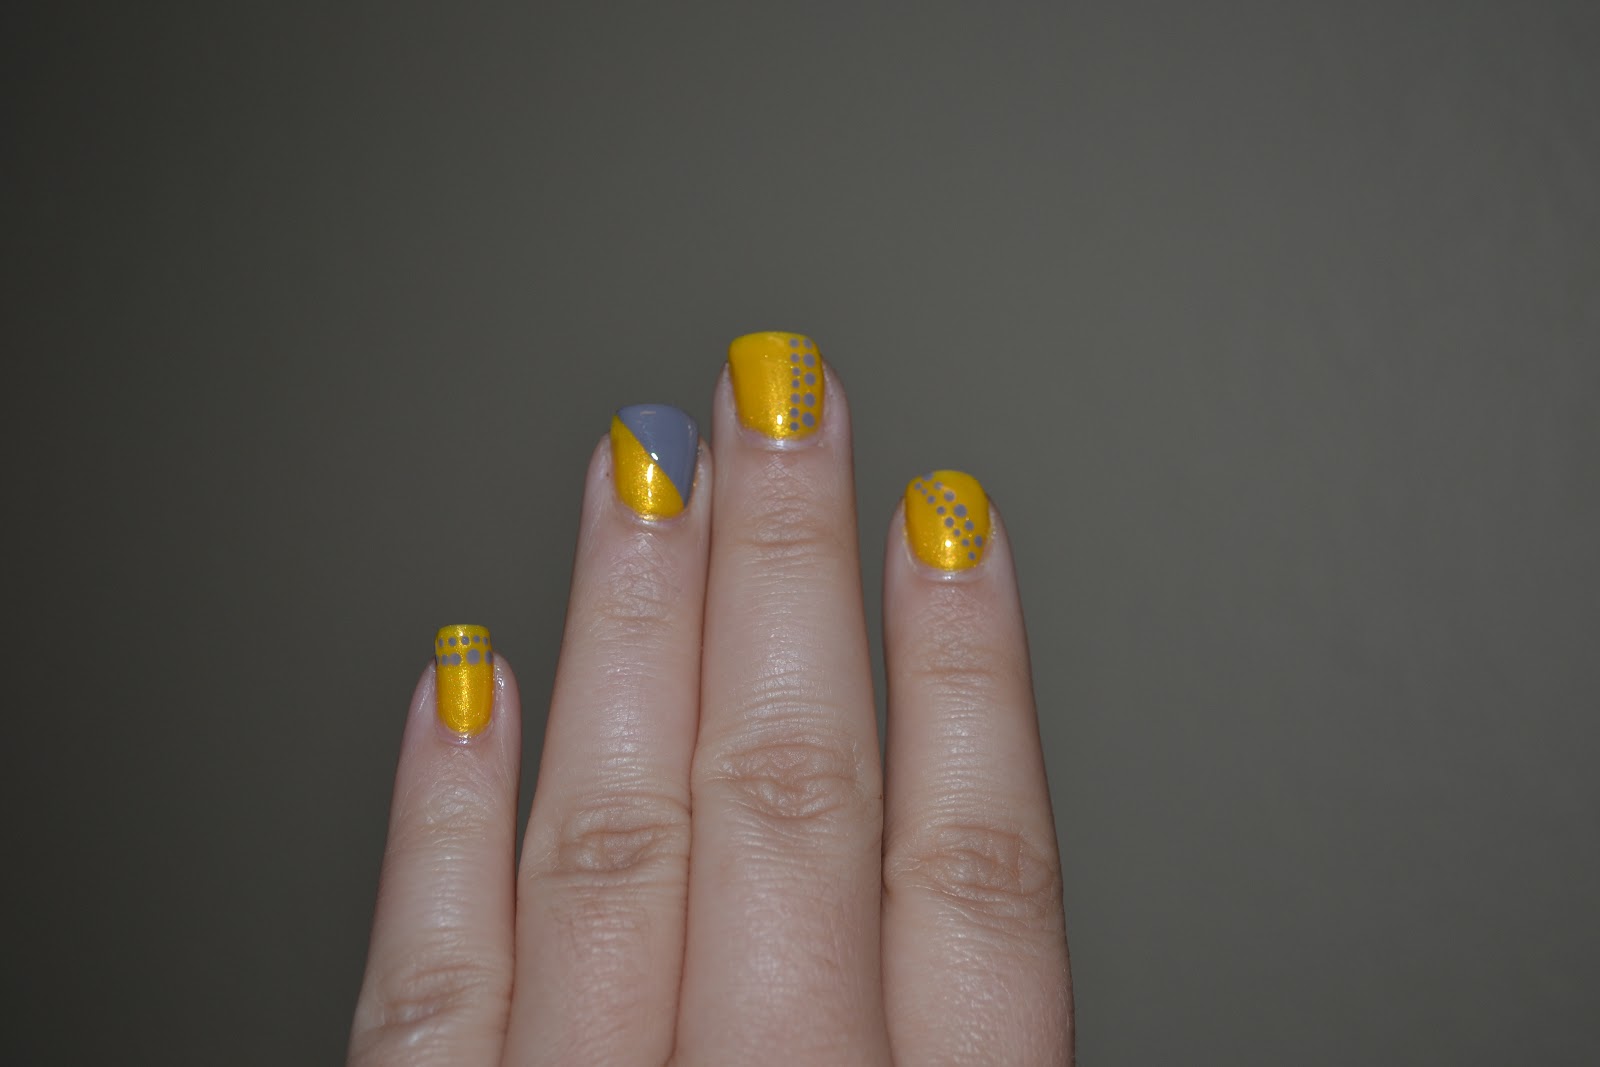
Add another layer of nail glue and allow to dry completely. (I started playing with the two new nail colors I bought: Sally Hansen Mint Sorbet and Sinful Pink.


Once, it’s dry, use a block nail ridge remover/smoother to even everything out. Don’t be heavy handed on this either. Light strokes will remove paper that has air pockets underneath.


Once that’s done, apply one more layer of nail glue, allow to dry, and then buff smooth.

Note:
Since I knew I was going to be using a light colored nail polish, I didn’t want the bronze part showing through so I just applied one coat of white. You can see exactly how it’s not perfect and that’s okay. (When I used a dark color like Essie No More Film, I didn’t have to use a coat of white.)


Follow up with your normal nail polish.


Disclaimer: I’m not a nail tech, I’m only showing this because it has worked for me. If you aren’t  sure, go to a nail salon and they can either do acrylic or a fake nail, etc. Do not proceed if you are not comfortable working with nail glue, tissue paper and/or thinking outside the box.

Hope this helps!

Hugs,

A. 


Use a color wheel for fashion and decorating.

A color wheel can be a girl's (and boy's) best friend. Instead of feeling stuck in a rut when it comes to wearing certain colors paired together- use a color wheel to feel adventurous. It wont lead you astray- I promise!

Here are the few ways of using a color wheel:

  • Across the Street (Green & Red, etc)
  • Next-door neighbors.
  • Right angle (i.e. Blue & Violet, Yellow-Green & Blue-Green, etc)

Then to add even more colors:

  • Ix-Nay or X (Orange-Yellow & Blue-Violet with Green & Red)
  • Double Right Angle (Violet & Yellow and either Blue-Green or Red-Orange)


I found this color wheel just by searching Google.
Have fun finding new outfits from the clothes you already have!

Hugs,
A. 

Saturday, May 26, 2012

Just a thought I had...

I look at people as though they are books. The dust cover may be tattered, dirty and falling apart, but if handled gently, the book is still there yearning to be read. That book can bring happiness to many a people if handled appropriately. It just takes looking beyond the aesthetics and realizing that beauty is found in the unexpected. It's not going to be like the sun, bright and burning. Instead, it's caught in glimpses. And those glimpses, if taken the time to see, can be worth so much more during a life time.

What breaks my heart is when I see people who are stuck on aesthetics alone. Is being a size 6 going to bring any lady happiness? Is a set of washboard abs going to make a man elated? No. Being happy comes from within. If you can't be happy in the form that you or others are in, I feel sorry for you.

If you don't associate with people purely based on looks or because they talk differently from you, who gave you the idea that you are so far above them? People come in all shapes and sizes and to me, well, that just makes it more interesting! I don't want to look at perfect people, I want to see the different shapes and colors. I'm thankful for the eyes and ears that I have. I can see and hear how different people are and relish in their individual beauty.

-Ashley Petit.

Thursday, May 24, 2012

Happiness for $1.50

I've been trying to get more and more creative lately. Not because my lack of creativity itself, it's the lack of money. Plus a challenge to see the beauty behind something that just needs a little bit of TLC is always fun and to make it a reality is fun, too.

I'm going to finally cross something off of my To-Do List, getting a super cute frame for the first-time knittingsample. Here.  I wanted a basic wood frame in a soft-yellow color. I priced frames and the going rate I found online was $6+. Well, I trip to the Salvation Army during one of my lunch hours resulted in a $0.99 frame. Add a $0.05 sponge brush and a $0.50 bottle of paint and I'm stoked. I'm finally going to be able to frame my pride and joy. *Snort*

Here is the progress I've made tonight:

Tear down
Clean
Tape-off
Primer one side

Not bad for a work night, I'll make it to bed before 10. Woop Woop!


My new baby came home!
Michaels has a rockin' sale on this craft smart paint and their 1" sponge brushes 20/$1!!
Tear Down
The one side primered, I'm using the back that it came with to help me hold it right now. I'll reuse the glove!
Well that's it for tonight. I'll spray the back side tomorrow night after it has a day for the front to dry. This weekend I'll be able to take my time painting it to make sure I get it the color I want. I'm sure that spraypaint is a whole lot faster but I'm trying to watch my pennys right now. I'd say these 150 pennies (alright, 154 pennies!) were well spent. I'll get much more satisfaction from it this way.

Good night, sleep tight, don't let the bed bugs bite.

Hugs,
A.

**** UPDATE! 6/4/12- see my DIY update link for the finished frame- I just posted it :)

Tuesday, May 22, 2012

Express Mani- Essie No More Film.

What in the world happened to my gray/yellow mood?? Well, it's still there but I was tired of the mani already.

Plus, I wanted to show off a score from Walgreens. I bought it a while back and this is my first time using it. For $4 how could I go wrong? Yup- that's right- you read it correctly- $4...Essie- No More Film cost me $4!! *Squeal!*

Don't believe it? I took a picture of their round little sticker just to show you I'm not imagining stuff.  


I was thinking of a design and the thought instantly made me even more sleepy. So this will just have to be a one color deal. Plus, it's a pain in the butt to clean up (you can still see remnants of blue smudges, I can already imagine taking it off. Eesh.

Good night, sleep tight, don't let the bed bugs bite.

Hugs,
A.


Retro- Inspired Mani

I've been in a yellow/gray mood lately. I don't know why the colors are so appealing to me but they are. Alas, I have no yellow capris to wear with a funky gray and white top (yes, I have the outfit planned!) but I'll suffice because I definitely have these two colors in nail polish. Woop woop!

Of course I broke a nail just before I was planning on doing my nails so that threw everything into a tizzy. I used the method of using tissue paper and nail glue. It seems to be giving it some strength albeit it's also making the bed thicker. Knock on wood because I'm tired of broken nails. It's drivin' me bonkers!

Well, how about I shut my trap and get to showing you what I did with my dotting tools and some scotch tape?

Colors used:
Spoiled: Mind Your Own Beeswax
Sephora by OPI: Frankly, I don't give A-dam

Enjoy!


Now since I shut up and showed you the mani (It's the right amount of funky for me to at least be entertained by it)- here is the meaning of the colors:

Yellows: Wisdom, Joy, Happiness, Intellectual energy
Grays: Sorrow, security, maturity.

Pretty nifty, huh?

Hugs,
A.

Monday, May 21, 2012

Happy Sunday…er- Monday!

I was pretty busy this weekend. I worked on a Too-Cute Clutch (more to come later when the pin I plan on buying is delivered,) I hemmed pants, perfected the Garter Stitch (so not whompy-jawed like the first time I tried it,) cooked, and was even able to go walking both days with Daddy at a local park that has a beautiful trail.
Sunday, I cooked a tasty breakfast. Wanted pancakes so I used a simple recipe and voila- no fake n’ bake- these were from scratch!

***********************************************************
Recipe:

1.5 C sifted flour
3.5 sp baking powder
1 tsp salt
1 T white sugar
1.25 C milk
1 egg
3 T melted butter

Mix dry ingredients in a medium sized bowl, make a well in the middle, add wet ingredients, stir until just incorporated and then cook as usual.

Yields: I was able to make 5 good sized pancakes. 2 for me, 3 for daddy.

*************************************************************

The two pairs of pants I hemmed, I’m ashamed to admit have had forever and never worn because they were made for people of average height and not offered in my height bracket. Look at the before and after- how hysterical are my short stumpy legs?! *snort*
Anywho- I was tempted to REtry hemming jeans off of a Pinterest post I favorited and I must say, I’m sold on it. These jeans are perfect for wearing with wedges. And as you’ll see below, so are the white linen pants.


Have a great rest of the week. I’ll try to post some more during the week!
Hugs,
A.

Saturday, May 19, 2012

Charlie

I captured this really cute picture of Charlie- How intense is that look??


Just so you know, I was dangling the laser pointer and he really wanted me to use it. I will Baby Boy- I just need to buy new batteries.

Hugs,
A.

DIY Knitting for Beginners- Garter Stitch

I've been feeling very crafty lately and with a lack of time during the week, Friday night/Saturday morning means I can jump start stuff that I've hoarding and saving for a rainy day. Well, it's not rainy here but I'm finally able to start finalizing some stuff. I've still got a few more pieces to buy so I can truly use what I intend to make but with all that comes money. (I just spent $32 last night- that's it for right now!)

Just so I can update everyone- I've been knitting, just the garter stitch and haven't make anything yet, I've just been practicing. I'm getting a lot better at it. I've been wanting to learn because I love sweaters but what is sold here in Florida is wool and or acrylic- both either itchy and/or too hot. And the ones that I find that I love are so far out of my price range that it makes me really sad.

The videos that I found on YouTube were very good but like a few people I was pulling back double stitches. How frustrating! But from the feedback I wasn't alone. I was so frustrated that I wasn't getting it that I actually got out of bed, came back to the computer and scoured the videos until I finally got the detailed video that I needed.

Here is how I started learning the Garter Stitch:

Step One: Casting On


Once you've got all the first "loops" cast on, you need to know how to start knitting. This is the best video that I've been able to find. I'm more visual so I usually just turn the sound off and watch.

I got the hang of it,  but I still wasn't grasping it. I was grabbing double stitches and wore out a ton of yarn. Grrr! What was I doing wrong!?

I couldn't sleep until I understood what I was doing wrong!

How about I found the clip of all troubleshooting clips! It's close up and she goes at the perfect speed. Considering it was past 11pm, I was watching this with so much concentration that I had a major moment watching this:


Here's the link: You can see which piece to grab and pull through.


I hope this all helps you start knitting.

And just so there is proof out there, here's my first piece. It's uneven, so imperfect but surprisingly- I love it. I made it. $6 for two knitting needles and a ball of horribly itchy acrylic yarn brought me to squeals. I made this! :)


Yes, I will be framing this.. it's too cute! lol

Hugs,
A.

Monday, May 14, 2012

Dotting tools have arrived!

Yee-haw! Wasn't I just talking about "if I had my dotting tools"??

Well, lo and behold- they arrived in today's mail from Shanghai, China.

You wouldn't believe the deal I got on these either. $1.50- that's right one dollar and 50 cents. I found them on eBay. Free shipping. You can't beat that when it comes to being able to do cute things. Plus- think of all the trees I'll save by not using toothpicks anymore. Yahoo!

Here they are...

Hugs,
A.

Sunday, May 13, 2012

Sunday Mani

Ugh...I'm getting ready for the coming week. Overnight oats are done, salads are ready- yadda yadda yadda- my Greek nails were torn to pieces with the cleaning I did today so I just threw something on to keep my nails somewhat strong.

No designs, just one color- "Folly" from Sinful. I'm sleepy and my back hurts...maybe if I cleaned more often it wouldn't hurt so bad...?? Yeah, I think so too.

Hopefully my dotting tools will arrive soon, then I can at least add a little bit of something to them. Oh well, they'll suffice, better than 'neked' nails!

Goodnight, sleep tight, don't let the bed bugs bite.

Hugs,
A.


Semi-homemade Spice Cake

Happy Mother's Day!

I cooked today and my favorite part was dessert- Spice cake. Daddy chose the flavor and wanted cream cheese frosting on it. So he chose the box mix and I made the frosting- from scratch! 

This is all that's left as of typing this. I'm not sure how much longer it will last though...

And for the record, yes, I love a cake to look like this, I actually cut off the rounded tops. . Anal? Yes. But you have to admit it looks yummy and just so you know- it is! :)


Hugs,
A.


DIY- Workout Tanktop

I'm thrifty when it comes to money- I'm only going to spend money on something I can't make. So why spend $10 + for a work out tank top that is going to be sweat in? My thoughts exactly.

I scoured the DIY posts and youtube until I found exactly what I was looking for. (I don't have many t-shirts that can be butchered so I wanted to spend it wisely.)

Voila- I found the perfect clip, here it is.


And here is my breakdown for how to cut without having to watch the entire thing.

Cut off the sleeves and neck, make sure to remove the seam.

Detail of the neck.


Cut off more at the front, you can see the shape I cut out.

Cut out the racerback part on the back.
Cut a straight line on the front from the seam to the pit area.

I used both pieces from the arm area to cinch in the back.