Showing posts with label DIY. Show all posts

Sunday, June 2, 2013

Frumpy Dress Refashion

I'm seriously a goofball. I bought a dress at the Goodwill Clearance Center (let's just go with GCC from now on, okay?) and I was so stinkin' excited to get to ginghering that I forgot to take a before picture! 

So. Frustrating. ....grrr...

I mean, I was half way lopping off the top of the dress before my brain whispered "Camera. Pictures." 

So, yeah...sorry for the really 'awesome' before shot. Eesh...

Frumptastic Dress. Pretty print and the rayon feels so good!

Now, looking closely, you see that the entire top of the dress, sans the sleeves is smocked. Smocking is cute for babies not dresses. But I don't care because this is the Dress of Christmas Past. It'll just keep giving and giving. Just you wait and see. 


The top might not be working for this dress but I'm still going to hold onto it- it's going into my stash!
What I have planned for this dress is a simple skirt from the bottom part of the dress. So I just measured a skirt that I already have and just increased it for a waist band. Easy right? It is because I'm using the original hem! So smart :)

For the waist band, I first turned down a half inch of material and ironed it down. Don't ask me why I pinned it when I still had to fold and press again. (I'm telling you- super goofy!)


Next, I folded down an inch and pressed again- this time pinning for reals yo. 


Sew it up and leave a gap for the elastic. 


Weave the elastic all the way through (I used 3/4" cause I already had it!)


Pin together and sew. 

Then open and I like to sew the flaps down so as to not cause any weird bumps.
Sew the rest of the waist band closed. 


And wear...

wedges are Vince Camuto

This skirt is so roomy and comfy that I know I'll be wearing this a lot this summer. Gah! Can't wait! :)

Hugs, 

A. 

Tuesday, May 28, 2013

Cover that bleach splatter!

Sooo...remember this seriously cool tunic-y top from my GCC score? 


Woo hoo!
I finally got around to trying it on and maybe it's the bloated feeling talking but I'm totally digging this shirt as is. I mean, doesn't every girl need a few pieces that are perfect for bloated days? Well, this piece is going to be one. 

The smocking panel is the same on the back as it is on the front so it actually pulls it in just enough to show that a waist line does in fact exist and I'm not simply giving up on my body. But it's so roomy that I can't bear to even mess with the sides right now. Yes, it makes me look like I'm in the early stage of pregnancy but I don't give a flip. I'm bloated and nasty feeling and I just want to be comfortable and I'm not. (Want cheese with that wine?)

As I was trying it on and wanting to sleep in it I immediately noticed 2 things. 

One- the tag would not lay down in the back! The top is simply too big and the back gapes between my shoulder blades and that tag just flips out and dangles there like a dog on a hot day. Ugly. So off it came. 


Pick pick pick and toss. 
Next is a little more serious. Bleach splatter. Yep, four of them. How did I miss those?! Gah! But no fear here. I can totally cover those up. 


What. The. Heck. ?!?!?!?!?
Enter Tulip Fabric Markers. Black to be specific. This top may be navy but remember my last experiment with black and how it made the blue all better? Well, I'm applying the same principle here. 

Don't forget to use that 40% off coupon code @ Hobby Lobby. 
All I did was just use my lessons from Daycare- color inside the lines. Let it dry 24 hours and then washed and dried. Just looky..

Ready to wear. 
I must say so far I'm impressed. I was about to just use a sharpie but decided against it when I read that the black ink can leave a yellow ring after awhile. I didn't want to risk it so I figured this was the best bet. 

I even did another top that I bought at GCC and was willing to put some effort into it considering that it's linen and Cubavera brand. D has one of these shirts and loves it, it's classic and the style is characteristic of Ybor/Tampa. 

And here is that shirt: 

I refuse to give up on this!

Color. 

Much better!
Hope this helps. 

Hugs, 
A.

Saturday, May 18, 2013

Clean that Thrifted Purse

I finally found a straw purse that I like. The price of this GCC find is what I like. And it's pretty classic. It'll do for summer. 

But, as I've expressed on my little corner of the internet, I get super duper heebie jeebies thinking about what could be lurking on the items. 

So follow along and I'll show you how I clean stuff up pretty fast with just a little bit of elbow grease. 

First: a good look at the purse: 


le sac
Pretty faux tortoise latch piece. 
derriere. Not bad, huh?
This is actually more scary than the rest of the bag.
Alright, to clean the outside: I'm going to use the following: 

Leather cleaner, paper towels and Lysol Disinfectant Spray.
Spray the entire outside with Lysol. 

Then clean all the of the leather. 

I like to spray on a towel and then rub onto the leather. 

Yuck!
Now the really narly part- cleaning the inside. 


I used the following: 


Just drizzle it on and then start working into the lining of the purse with the nail brush. Wet your brush so as to make sure the color safe bleach spreads over the entire surface. 


Leave on for 10 minutes and then rinse. 


Then hang up like so to allow the lining to dry. 


Once dry then hang up like so with some weight in the purse to straighten out those whompy jawed straps. 

It doesn't have to be a lot, just enough
After that, use, use, use! 

Hugs, 

A. 

Thursday, May 16, 2013

Dye Dammit Dye!

So I've been bitten by the RIT Dye bug. I first dyed a pair of white shoes a lemon yellow over a year ago and have come back into it recently after realizing no local fabric store sells navy blue knit- wth?! Thanks to Jill @ Refashionista I decided to DIM- do it myself. There's only one hang up though. I refuse to dye in my washing machine. My washing machine is my baby and I refuse to do anything to it out of the ordinary. 

After some research and lots of posts about how Navy failed- I decided to actually follow Rit's directions- Stove Top Method. My white knit material turned out a perfect Navy Blue. Funny how following the directions actually worked! 

Here's my arsenal that I built for the Stove Top Method: 


What you see is a stock pot, a spoon and pair of gloves. Keep this in mind: If you use a pot you cook with- you have to sanitize it with bleach after using it for dye. Rit's Rules- not mine. 

I bought my stock pot at Goodwill for $4 (The regular one not the Clearance) and the spoon is from Dollar Tree. The gloves are courtesy of Daddy- thanks Daddy!

Alright, now let's get on with the tutorial: 

Black Rit Dye  (Ooooh- Spooky! Well, it really isn't. If you can master Navy Blue, Black is pretty darn simple, too.)


Here are the two test items I chose: 

Yowza that's a busy. Eesh... but nice comfy material!
Another man's t-shirt that I really liked. All except the spots all over it. Look closely. 
Alright, now down to business! But first- completely soak the item you're about to dye in warm water. Ring and shake out so that's it's loose. (Per Rit. Again, I've been successful with their directions so just humor them, okay?) Now add to the dye bath. 

First up was the skirt. Now I didn't want to change the stripes, I just wanted to tone down the busyness of it. So I decided I wasn't going to give it a long bath. Just enough for the white color to change to gray. Follow your instinct- it's usually spot on. 

Skirt in the bath: 


It's not as scary as it seems. After about a minute and a half in the bath I felt pretty good knowing that it was done. 

Now rinse completely where there is no more dye coming off, I'm serious when I say this. Unless you want a mishap in your washing machine. Then it's all on you. And no rinsing in plastic bathtubs; it will stain. Porcelain you *might* have better luck with but do it at your own risk. I prefer a stainless kitchen sink. 

Ooohhhh- I like!


Next the t-shirt. I decided since those dark stains were refusing to come out, I had a feeling if I tried navy blue dye the spots would still be there so I figured black and hope it goes well. Ha! Take that stubborn stains. I'll show you.  

Do everything the same except let the shirt stay in the bath for a good 15 minutes. Stir constantly. 

Take out and do the same as the skirt: Rinse. Start unballing it and voila!

Screen printing isn't affected by dye. 
Now, go wash the items in the washing machine. Use other dark clothes that can take any minute bleeding (I'm paranoid, what can I say?) and when done washing hang to air dry. 

I'm serious when I say this to everyone- dying is not hard. It's scary yes because I was initially worried that it was going to turn out horrendous. But it's really not, especially when I'm using items I found at the Goodwill Clearance Center for pennies. Now I will wear both without any hesitation. 

See?

Who knew?! Bright blue + black = navy and gray. 
I wanna wear it now!
The navy looks brand new! Sweet!
I don't see any funky spots. 
Now go try it and take your time. You can do it! I have total faith in you. 

Hugs,

A. 


Friday, April 12, 2013

DIY Refashion Man's Tee to a Woman's

I love a man's t-shirt. All except for 2 things: the boxiness and the neckline. Otherwise they have all of the cool logos. Logos that I want on a woman's shirt. But gosh darn it- I hate those prices. Even at Walmart, the asking price is $17 -$20. And on top of that the women's shirts are too short for my long torso. I might as well be wearing a mid-driff shirt. Seriously, not cute. 

So what I do is go to my trusty Goodwill or Salvation Army and snag up shirts for $1 - $2. (those prices make me happy all the way around!) And a few snips and cuts and sews later I've got a more feminine shirt. 

Here is how I refashion mine: 

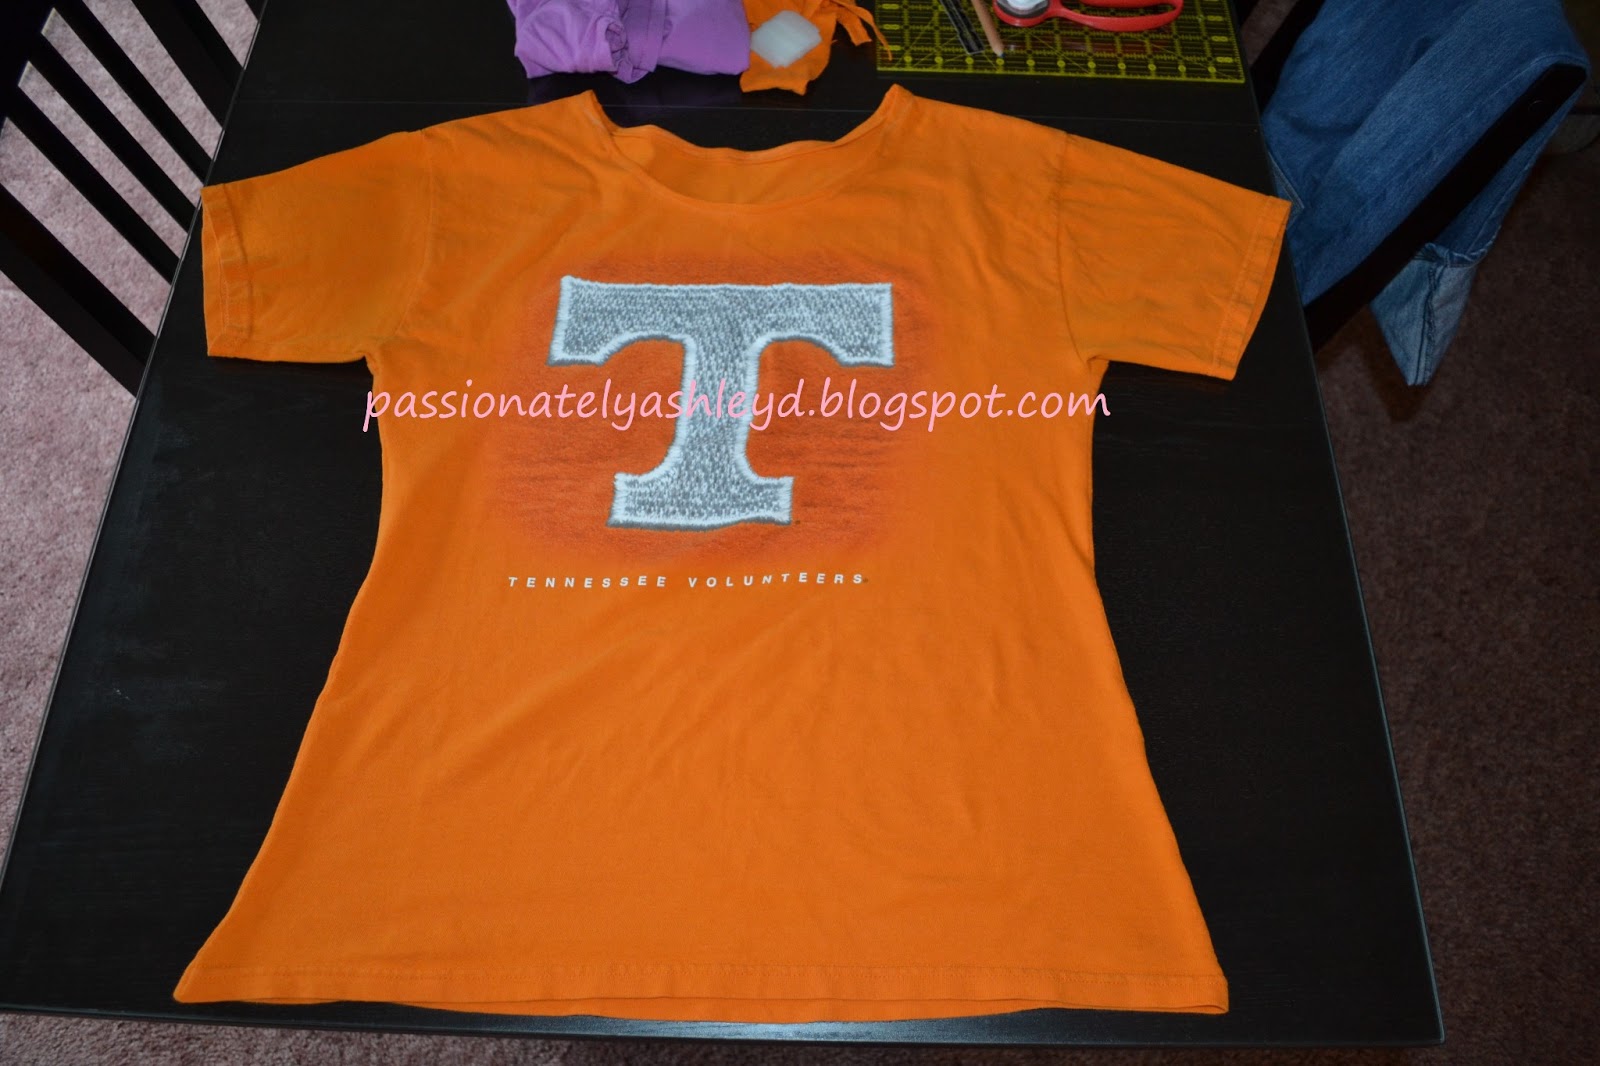
Here's the before: Go Vols!


I may be Square but I don't like to wear 'em.
Next, use a t-shirt you already have as a guide for where you want the curve to be. 


Using chalk, mark where you're going to sew.


Then pin in place. 


Sew then cut the excess off. 


So pretty...but not done yet! 


Now the fun part- getting rid of that horrible neck. How do you guys wear that? Well, stupid question because if you had any other neckline I would say, "Hmm..." Mark the general area where you think you want your neckline. 


Pin in place. Try on very carefully- getting a pin stuck in your neck is no laughing matter. So girly, am totally loving this!


Sew and voila!

So much better...butter..better...you know what I mean, K! ;) 


I love this so much more! :) Sure hope this inspires you to chop up those boxy shirts and make 'em yours. Rock those curves ;)

Hugs,

A. 

P.S. As soon as I got done with this post- I catch Charlie showing me he approves of my handy work and knows how to rock the shirt too- by putting butt cheek prints on it. That's true love isn't it?